


You have no items in your shopping cart.
Flow Test Instructions
Flow & Pressure Test Instructions
Accurate flow and pressure results are required before we can design your irrigation system. These results show how much water is available at different pressures, which determines how many sprinklers or drip zones can run efficiently.
Required for all design requestsWhy a Flow Test?
Every irrigation design is built on two facts: flow and pressure. If either is wrong, the design will not match your water supply.
- Sprinklers and dripline are pressure sensitive. A nozzle that is designed for 250 kPa (≈ 35 psi) will throw and distribute water correctly at that pressure. At 200 kPa (≈ 30 psi) it underperforms. At 300 kPa (≈ 45 psi) it uses more water and can overspray.
- Flow sets zone size. If you have 30 L/min available at 250 kPa, a zone can only include sprinklers that add up to 30 L/min or less. If we over-estimate, pressure drops and performance suffers.
- Static pressure is not enough. A high static reading looks good, but it does not tell us what happens once water is moving. We need readings at working pressures to design accurately.
- Bucket tests do not work. A bucket and stopwatch measure water at zero pressure. Irrigation systems always run under pressure, so the result is misleading.
In short:
- ➡️ The flow test shows how your water supply behaves at 200 kPa (≈ 30 psi), 250 kPa (≈ 35 psi), and 300 kPa (≈ 45 psi).
- ➡️ With these results we can size pipework, select the right nozzles, balance zones, and achieve even watering.
- ➡️ Without them, it is guesswork, which leads to poor coverage, wasted water, and extra cost later.
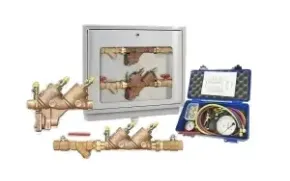
Need equipment? We have a digital flow & pressure tester available for hire — $100 deposit, fully refundable upon return.
How to Perform the Test
- Remove all fittings from the tap you will test from.
- Ensure the ball valve on the tester is closed (handle horizontal).
- Screw the tester firmly onto the tap.
- Turn the tap fully open. No water will flow because the ball valve is still closed.
- The gauge will now display your static pressure (no flow).
- Press the orange button on the device and confirm the display shows L/min.
- Slowly open the ball valve until the gauge reads 300 kPa (≈ 45 psi), then record the flow rate in litres per minute.
- Repeat at 250 kPa (≈ 35 psi) and 200 kPa (≈ 30 psi), recording each flow rate.
- Include all three readings with your design request.
Reminder: Please submit your flow test results with your design request. Without this data we cannot size your system correctly.